See your Nightscout data on your Garmin
- tynbendad
- Mar 12, 2021
- 3 min read
Updated: Nov 15, 2021

These 4 steps let you see your Nightscout site's CGM data on a Garmin device that supports Connect IQ, via the internet and your phone.
Before starting, if you do not yet have a Nightscout site, please refer to the facebook group https://www.facebook.com/groups/cgminthecloud for Nightscout setup help.
If you want to setup your Dexcom and Garmin in a way that shows BG without requiring internet access (except for setup), you should instead look in the facebook groups https://www.facebook.com/groups/xDripG5 (for Android) https://www.facebook.com/groups/spikeapp (for iOS) or https://www.facebook.com/groups/cgminthecloud (for anything else.)
Once xDrip+, Diabox or possibly Spike are setup and showing your CGM data, my Garmin apps should show CGM data from them without any further setup necessary.
If you already have a Nightscout web site showing your BG, congrats - read on to show it on your Garmin.
Garmin compatibility:
The Garmin connect store pages show which Garmin devices are compatible with each app, make sure your device is listed here before starting:
watchface: NightscoutWatch2
data field (for activities): NightscoutData2
Step 1 "setup access token"
This step only applies if you have your nightscout config variable "AUTH_DEFAULT_ROLES" set to "denied", in order to restrict access to your site. If you do not have this setting please proceed to Step 2. If you're unsure, refer to http://www.nightscout.info/wiki/welcome/website-features/0-9-features/authentication-roles.
Open your personal nightscout site in a browser and go to the "hamburger" menu in the top right, and select Admin Tools. Once there, select "Add new Subject", enter a name, e.g., "garmin", in roles enter "readable" (without the quotes), and click "Save".

Your admin tool page should now show you a new access token, such as this:

You'll want to copy the access token exactly as shown on your browser, you'll be using it in a later step.
Step 2 "install watchface"
(If your Garmin device is not a watch, you should skip to Step 4.)
From here we will be using the phone that you have previously paired your Garmin device to, with the Garmin Connect app. If you haven't done this yet please refer to https://support.garmin.com/en-US/?faq=8CBmYmJHUr36wvJ6AktXFA.
Open the Garmin Connect app on your phone and click on the device icon on the top bar.

Click "Appearance", then "Watch Faces", then "Get More Watch Faces"
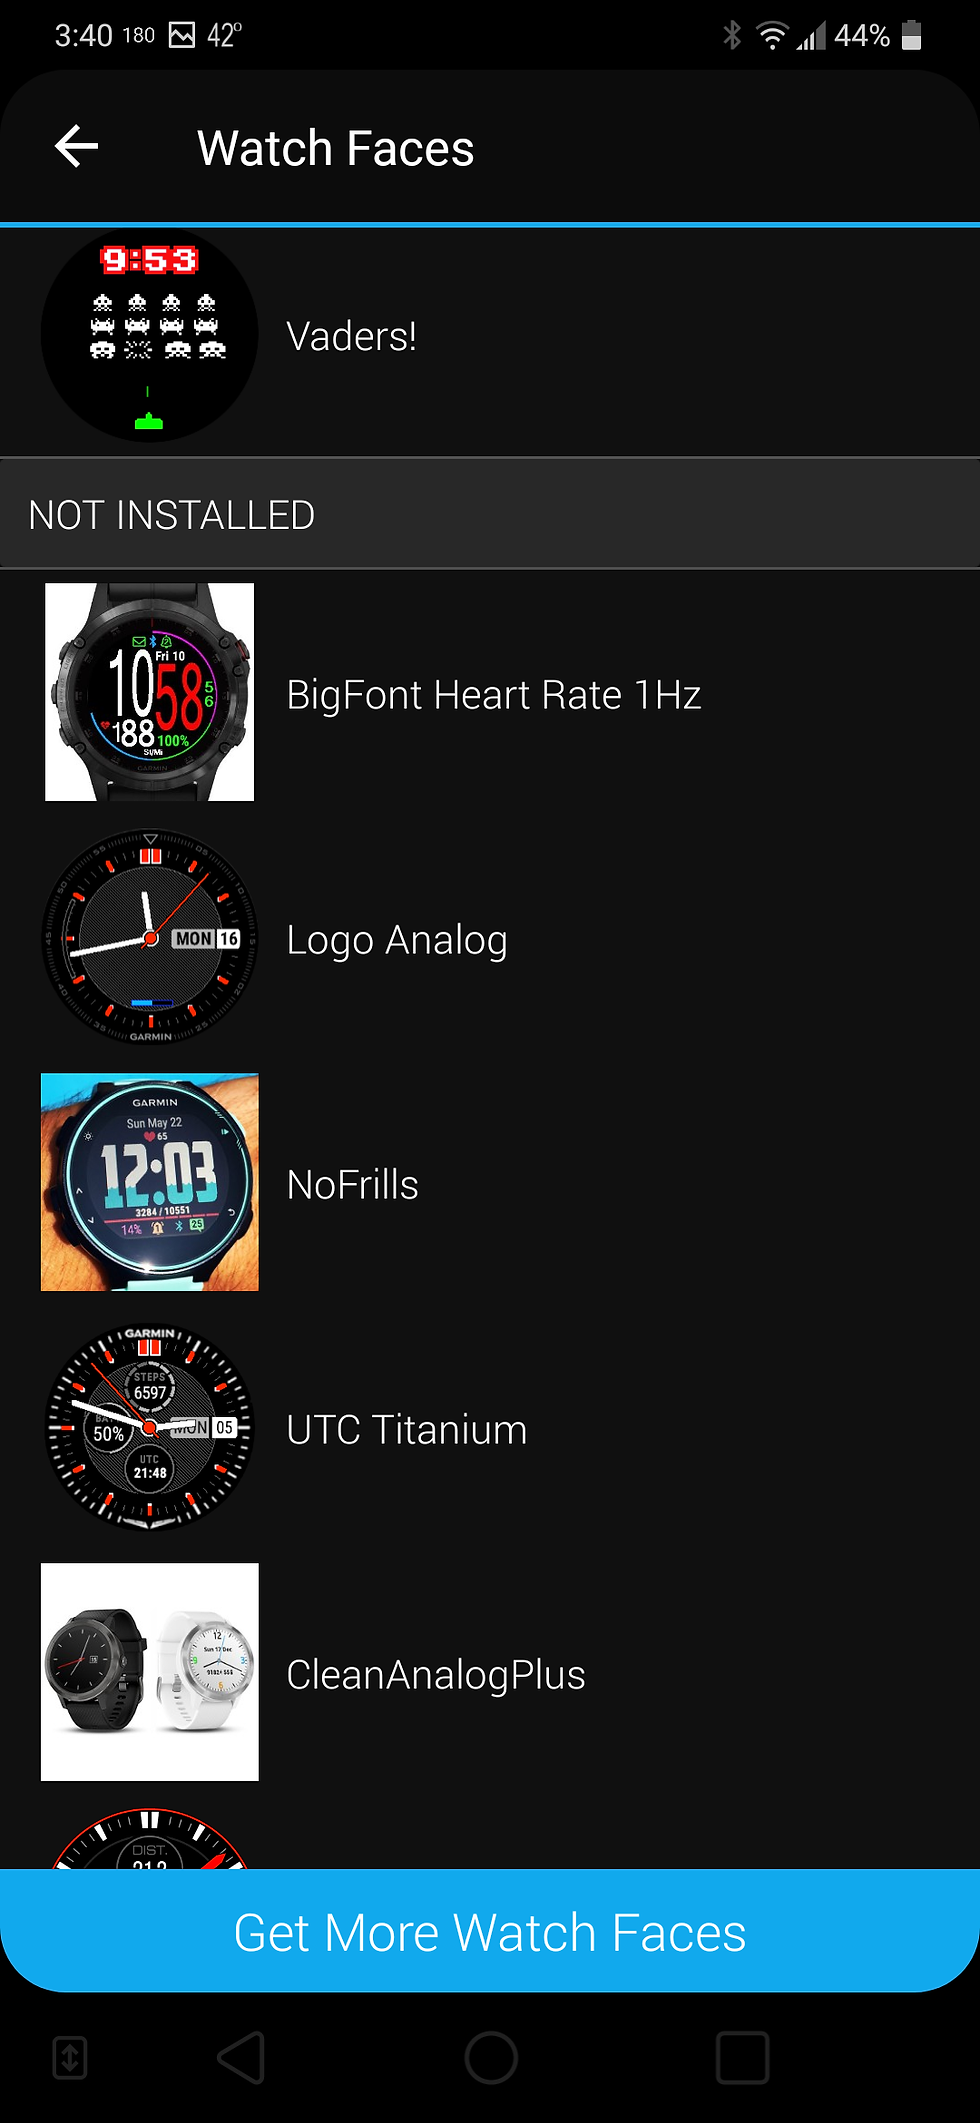
Choose "Not Now" to skip using the store app, you can do everything in Garmin Connect itself.
Search for NightscoutWatch2:

Select NightscoutWatch2 and then click Download. Garmin Connect will ask you to allow it access to run in the background on your watch, and access the internet, choose "Allow".

Your phone will then begin sync'ing the app to the watch. Select the back button in the upper left corner to return to your device screen and wait for the sync progress indicator on the upper bar to finish before moving to the next step.

Step 3 "setup watchface"
While still in Garmin Connect, in your Garmin device screen, again click "Appearance", then "Watch Faces", then "NightscoutWatch2", then "SETTINGS".

Click on the setting labelled "Online Site URL (optional)", and enter your Nightscout site URL, and if you completed Step 1, append your access-token as well.
I.e., if your site does not require an access token, you would enter for example: https://yoursite.herokuapp.com
And if your site does require an access token, you would enter for example: https://yoursite.herokuapp.com?token=garmin-a77dc044ad4319cf

Click OK and then DONE (do not forget to click DONE, it is required.)
If all you wanted was to setup a watchface you should be done. Normally Garmin connect will automatically switch your watch to show the last installed watchface. If not, depending on your watch you can long press on the face, or use the menu buttons on the watch itself to change watchfaces.
Step 4 "install and setup data field"
Repeat Steps 2 and 3, except instead of selecting "Appearance" and "Watch Faces", select "Activities, Apps & More", and "Data Fields". Search for and install "NightscoutData2" and set the URL in the same way as the watchface.
Once you have completed this, in order to see the data field you must start an activity on your Garmin device and then setup the activity screen to add the Nightscout data field. Each Garmin device has its own quirks in doing this, the best way to get help is to go to support.garmin.com or google.com and search for "<your device model> Customizing the Data Screens", e.g., "Vivoactive 3 Customizing the Data Screens".

I have followed this really helpful description to see the Nightscout data on my Fenix 6S Pro. I can see the data field on my watch, but I get an instruction to refresh - do you know how I do that? I also get an error code 400.